Choose, activate and use a second authentication factor
🚀 Do you want in‑person support?⚓
Tip : Do you want in‑person support?⚓
We invite you to come ask your questions or activate your second factor during our office hours (free access, no registration) :
📅 Monday 21 September 2026, between 2 p.m. and 5 p.m.
& 📅 Tuesday 22 September 2026, between 9 a.m. and 5 p.m. (non‑stop) :
- At the Atrium, in the digital spot on the ground floor.
- At the University Palace, in the Aula.
📅 Thursday 24 September 2026, between 9 a.m. and 12 p.m. :
- At the Atrium, in the digital spot on the ground floor.
- At the University Palace, in the Fustel room.
Cronenbourg campus staff, office hours are also organized by your local IT staff :
🗓 Friday 25 September 2026, between 9 a.m. and 12 p.m.
🗓 Tuesday 29 September 2026, between 9 a.m. and 12 p.m.
Both days, in Werner room, at the ECPM (building 100). Signage will be set up to guide you.
For on‑site activation, bring your device (laptop, mobile, ...).
📌 CAS-MFA: the application to choose and activate your two‑factor authentication⚓
For your first use of A2F, go to the double‑factor management application for CAS authentication (named “CAS‑MFA”) and log in with your Unistra account.
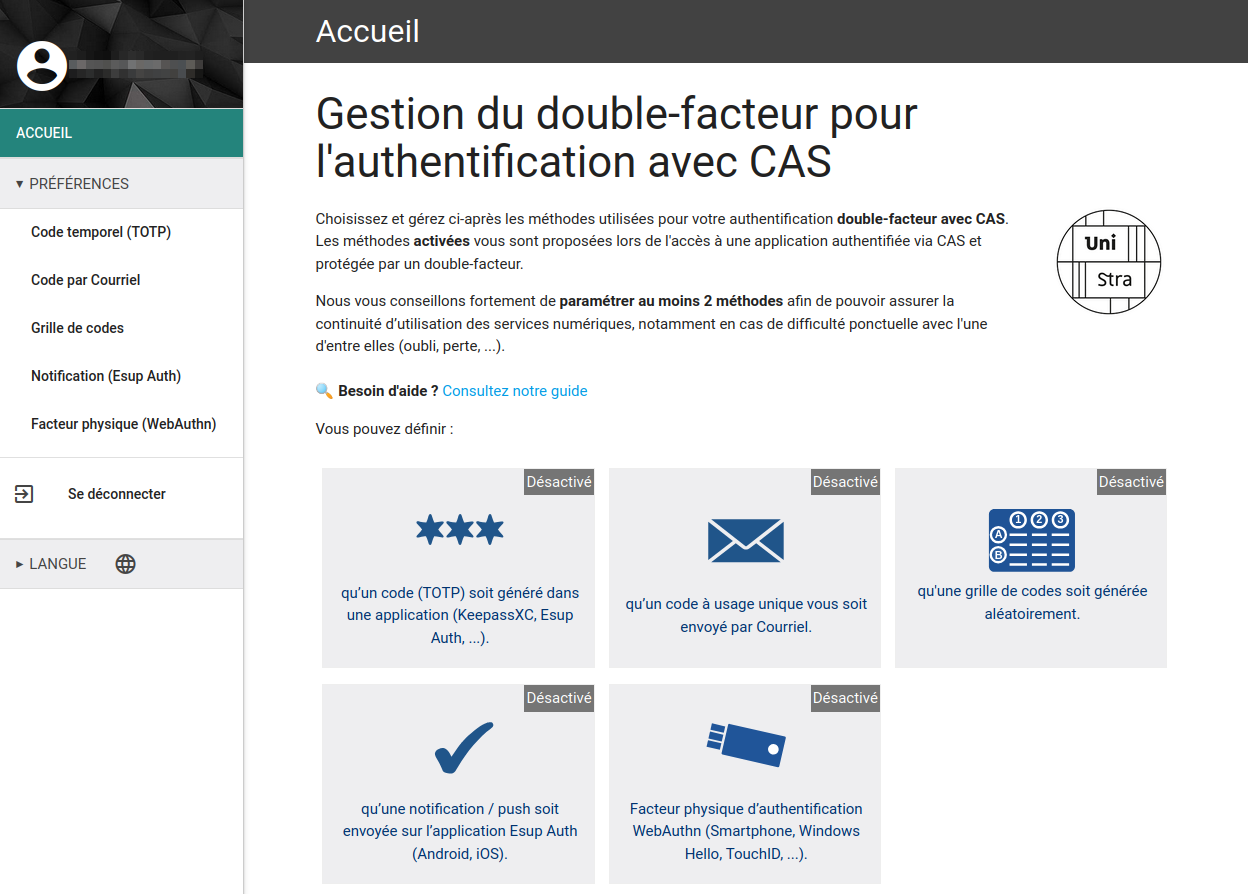
The factors, here called “methods”, offered are listed on the home page. These are the different options you can use to authenticate: you can activate one or several, as you wish.
As long as it remains active, a method is usable daily, without needing new configuration in CAS‑MFA.
Advice :
We recommend activating 2 methods, to have a “backup” method in case of problems with your preferred one.
If you activate only one, make sure its secure backup is accessible from another of your devices (e.g., see our step‑by‑step for the “TOTP” method with the KeepassXC vault, which can store your passwords in your AD or on Seafile).
At each strong authentication, only one second factor will be requested. If you have activated multiple methods, you can use any of the corresponding methods, as you wish.
Tip : 💡 Help selection table: the methods offered at a glance⚓
Method | Required elements | Setup | Daily use |
|---|---|---|---|
TOTP code | An application generating one‑time codes: e.g. KeepassXC on PC or EsupAuth on mobile. Do not use a browser extension (exception for the KeepassXC one). |
* KeepassXC and its Firefox extension are pre‑installed on computers managed by DNum. | 6‑digit code, provided by its application:
|
Code sent by email | Using a personal email address. | Register and confirm your personal email address on CAS-MFA. | 6‑digit code, received by email, to copy/paste. |
Code grid | A way to digitally secure the grid, e.g., using KeepassXC, or a way to print it. If printed, keep it in a safe place. | Save or print the grid. KeepassXC is pre‑installed on computers managed by DNum. | 6‑digit code to look up in the grid and enter. |
Push notification (on Esup Auth) | A mobile with the Esup Auth application installed. | Pair your mobile by scanning a QR code on CAS-MFA. | Notification received in the Esup Auth app to be approved using the mobile. |
WebAuthn physical factor | A hardware security device, e.g., a USB security key or a mobile; a compatible browser. Be self‑sufficient in setup and use: DNum does not provide specific support. | Pair your security device on CAS-MFA. | Depending on the device, e.g., touch a key or unlock a smartphone. |
Once your methods are chosen, to activate and use them, expand as you wish:
TOTP code, 6‑digit time‑based code (recommended method)⚓
🔍 It is a 6‑digit one‑time code calculated on a time basis (TOTP is the English acronym for “Time based One Time Password”).
Choose the application that will generate the codes for you⚓
Several applications can calculate or generate TOTP codes. We recommend the KeepassXC vault (desktop) or Esup Auth (mobile app).
Advice : ⭐ Recommendations :⚓
⭐ Ideally generate your TOTP on another device: using a security key (hardware) or any TOTP app on a smartphone (like Esup Auth), for example.
✨ The simplest without another device is to use KeepassXC and its official browser extension (pre‑installed on Windows and Linux workstations managed by DNum): the TOTP code can then be entered automatically.
Do not generate your TOTP in your browser using other extensions or plugins: browsers are entry points and frequent infection targets. The official Keepass extension is OK because it does not generate the codes in the browser; it only links to Keepass, which performs the calculations.
Follow the procedure corresponding to your choice:⚓
Procedure : Activate TOTP by generating your codes with KeepassXC⚓
Procedure : Activate TOTP by generating your codes with Esup Auth⚓
This configuration is to be performed only once, during activation. If the method is already activated, you can use it directly.
Tip : Do you prefer to follow a video tutorial? ✨⚓
→ Activate and use the TOTP code on mobile.
Otherwise, follow the written and illustrated steps below.
Warning :
Below, click the icon  (“Show steps in list”) to miss none.
- Activate the method⚓
On CAS-MFA, click on the three‑star tile indicating “that a code (TOTP) is generated ...”

Click on the slider to
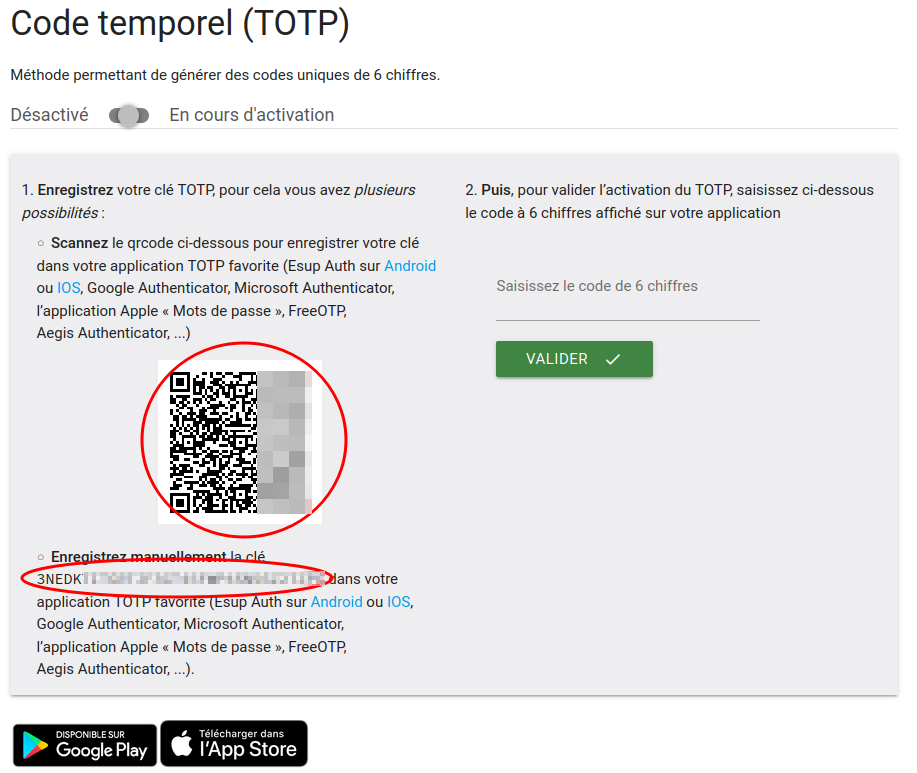
Activatethe method.A QR code and a string of characters are displayed. This is the secret that will allow the application you have chosen to calculate the TOTP codes.
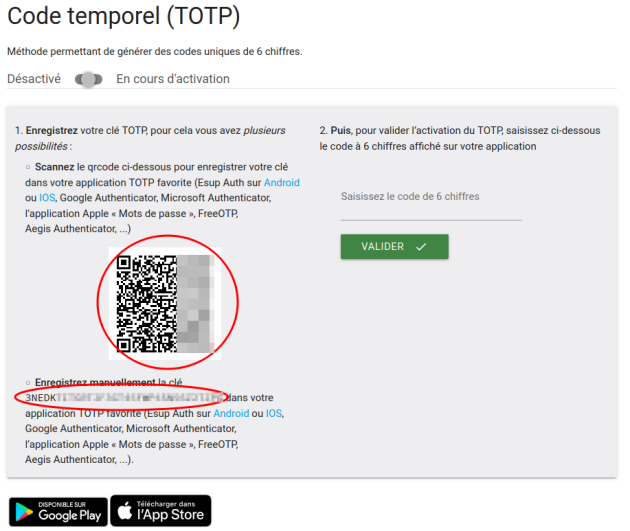
- Install the Esup Auth application⚓
On the CAS-MFA page displaying the QR code, click the download link corresponding to your mobile's system (Android or iOS) to install Esup Auth. Once the application is installed on your mobile, launch it.

- Place the secret in Esup Auth⚓
In the Esup Auth app, choose
+thenScan QR code. Then scan the code.Once the secret is saved, the app confirms and shows you the current valid code and the remaining validity time.
 If you have difficulty scanning with Esup Auth...
If you have difficulty scanning with Esup Auth, you can click Return to cancel, then click
+andManual entry.
Choose
TOTP; in theAccount namefield, enter your Unistra identifier (or another name to recognize the method). In theSecret keyfield, enter the string of characters shown just below the QR code (uppercase letters and numbers) on the CAS-MFA page. Save by clickingAdd. - Generate your 1st TOTP and validate the activation of the method⚓
On the CAS-MFA page, in the right-hand field requesting a 6-digit code, enter the code displayed by the Esup Auth app and then click
Validate. - Result
If the activation of the TOTP method succeeded, the CAS-MFA page changes to display the activated slider.
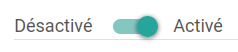
Otherwise, retry entering or copy-pasting the 1st TOTP more quickly (which may have expired).


Procedure : Use the TOTP⚓
You are trying to access an application that requires a second factor? Once your Unistra password is validated by CAS, it will display an intermediate page asking you to enter your second factor.
Example :
CAS asking you for a TOTP code:

Extra : You have enabled multiple methods: how to change the one offered?⚓
If you have enabled multiple methods for your second factor, the page will by default propose reusing the same as your last login. To use another one, click on the link « Other login method » then on the tile corresponding to the desired method.
Example of tiles with the TOTP, email and code grid methods enabled:

- Generate and use your TOTP code⚓
Choice 1: you use KeepassXC to generate the codes⚓
With the KeepassXC browser extension (installed and configured) : click on the green icon to the right of the TOTP input field to automatically fill in the 6‑digit code.
🔍 The first time, KeepassXC may open an access request window corresponding to your TOTP entry: select your entry or tick the associated box (if necessary), tick the Remember box then click the Allow selections button. Ex. with an entry named « CAS » :
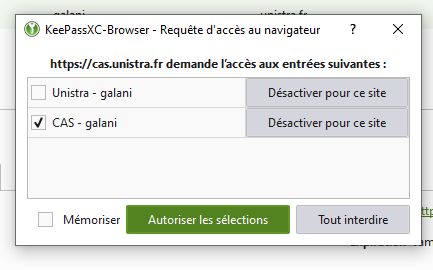
Without extension :
In KeepassXC : select your TOTP entry then menu
Entries,Time‑based One‑Time Password (TOTP),Copy the TOTP. You can also use the keyboard shortcutCtrl+Ton the selected entry.On the CAS page : paste the code into the displayed input field.
Note: The copied code is valid for 10 seconds; if needed, repeat your copy/paste.
Choice 2: you use Esup Auth to generate the codes on your mobile⚓
Open the Esup Auth app. In the CAS page input field, enter the 6‑digit code shown by the app that corresponds to your TOTP record.
Warning :
Each TOTP code is only valid for 30 seconds. If you missed the window, try again with the new code provided.
If the code is correct, you are taken directly to the requested digital service. Otherwise, an error message appears and the input field is presented again.
Code sent by email⚓
🔍 It is a 6‑digit one‑time code that is sent by email.
📌 Notes :
only “personal” addresses, i.e., non‑institutional addresses like @unistra.fr or @etu.unistra.fr, are accepted. Indeed, if you use your Unistra address, a compromise of your Unistra password would also compromise your second factor, thus allowing access to emails and the account without A2F.
do not rely solely on this method: email delivery also depends on your email provider. It is not uncommon for delays to occur or for providers to block messages sent by Unistra.
Tip : Do you prefer to follow a video tutorial? ✨⚓
→ Activate and use the code received by email.
Otherwise, follow the written and illustrated steps below.
Procedure : Activate sending the code by email⚓
This configuration is to be performed only once, during activation. If the method is already activated, you can use it directly.
- Activate the method⚓
On CAS-MFA, click on the tile showing an envelope and indicating “a one‑time code will be sent to you by Email”

Click on the slider to
Activatethe method.An input field appears. Enter the chosen email address then click on
Save.
Check the indicated email inbox, copy the received 6‑digit code.
Back on CAS-MFA, paste this code into the designated field then click on
OK.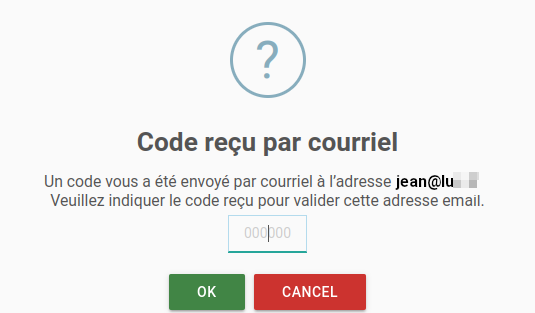
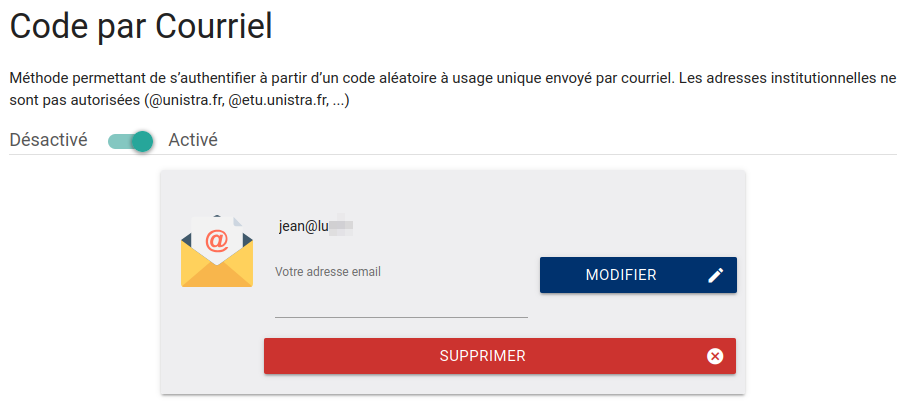
If the activation of the email sending method succeeded, the CAS-MFA page changes to show the activated slider and the reminder of the saved address.
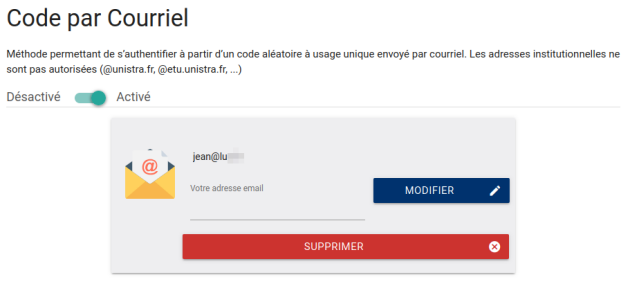

Procedure : Use the code sent by email⚓
You are trying to access an application that requires a second factor? Once your Unistra password is validated by CAS, it will display an intermediate page asking you to enter your second factor.
Example :
CAS asking you for a code received by email:

Extra : You have enabled multiple methods: how to change the one offered?⚓
If you have enabled multiple methods for your second factor, the page will by default propose reusing the same as your last login. To use another one, click on the link « Other login method » then on the tile corresponding to the desired method.
Example of tiles with the TOTP, email and code grid methods enabled:
- Retrieve your code and use it⚓
Check the indicated email inbox, copy the 6‑digit code received.
On the CAS page : paste or enter the code in the displayed input field.
If the code is correct, you directly access the requested digital service. Otherwise, an error message appears and the input field is presented again.
Note: In case of an error and if you had enabled another method, CAS may automatically switch to another method.
Code grid⚓
🔍 It is a list of 6‑digit codes organized in a grid.
These codes are generated when the method is activated. They can, for example, be used as a second “backup” method in case of difficulty with your preferred method.
Tip : Do you prefer to follow a video tutorial? ✨⚓
→ Activate and use the code grid.
If you want to protect your grid in KeepassXC but have never used it, start with this dedicated tutorial: Configure KeepassXC and its browser extension.
If you prefer a written tutorial, follow the written and illustrated steps below.
Procedure : Activate the code grid⚓
This configuration is to be performed only once, during activation. If the method is already activated, you can use it directly.
Choose the safe that will keep your codes⚓
We recommend and document below the use of KeepassXC (desktop).
Advice :
If you print your code grid on paper, keep it with as much care as your identity or bank card.
Warning :
Below, click the icon (“Show steps in list”) to miss none.
- (If necessary) Install KeepassXC⚓
If your workstation is managed by DNum : KeepassXC is pre-installed on Windows and Linux workstations. For macOS, contact us if needed.
If you manage your workstation yourself : from the vendor's website, you can download and install KeepassXC (Windows, MacOS, Linux), at https://keepassxc.org/download.
- (If necessary) Initial configuration of KeepassXC⚓
Once KeepassXC is installed, if not already done, perform its initial configuration:
Open KeepassXC then click on
Create a database.
This is the encrypted file that will store the various usernames and passwords you entrust to it.
Enter a name for this database (optional).
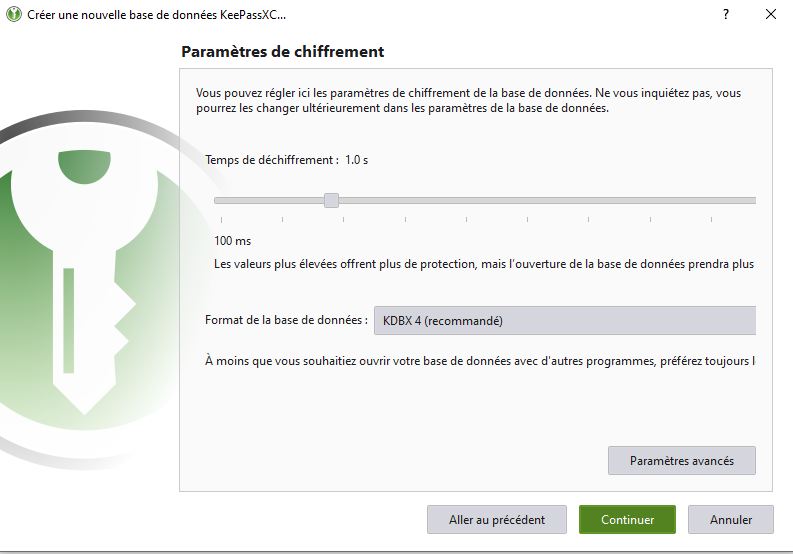
Set the encryption parameters. You can use the default settings (“KBDX”).
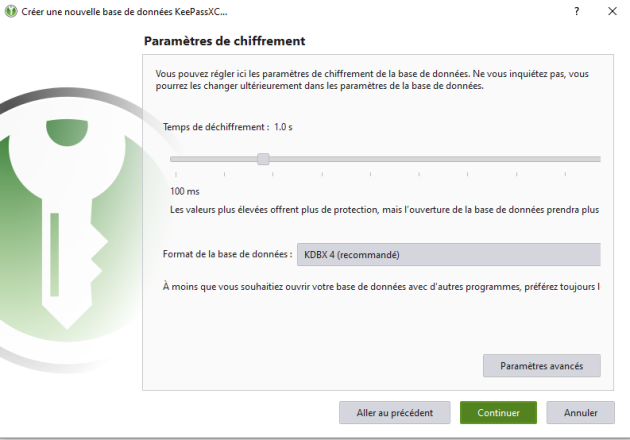
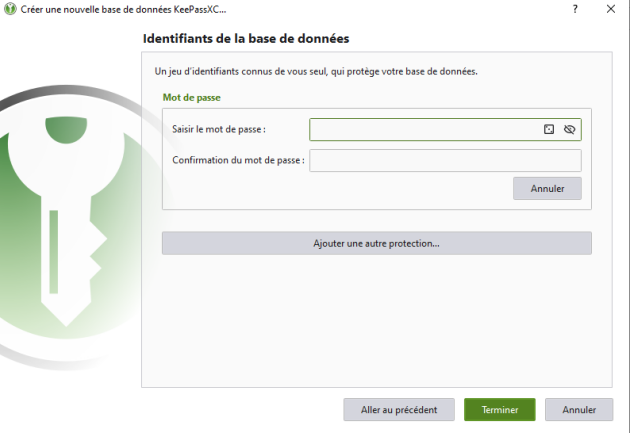
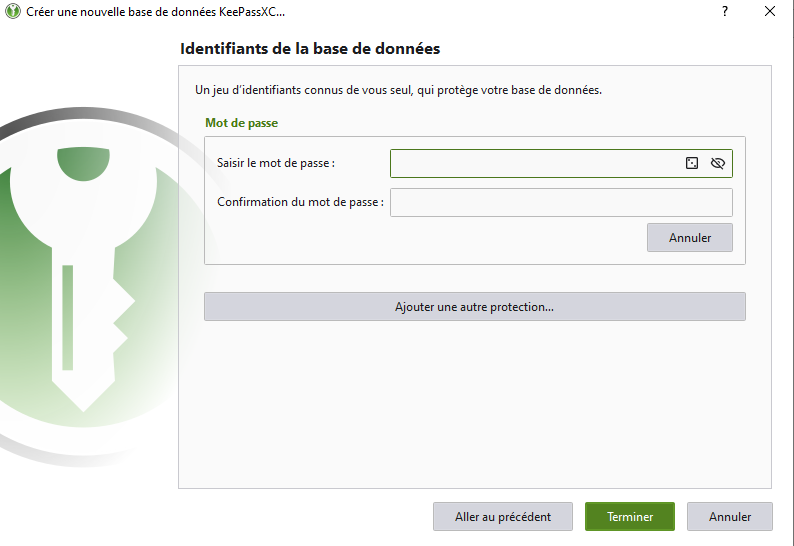
Choose a strong password (ideally a good passphrase) to unlock your database, i.e., access all passwords stored in this database. Do not use your Unistra password!
⚠️ No one will be able to recover this password if you lose it. Don't worry, if you follow our creation recommendations (link above), it should be easy for you to remember ... while being difficult for others to find.
Choose the storage location of your database on your workstation.
⚠️ Make sure to choose a location located in your AD (usually “Desktop” or “Documents”) or synchronized via Seafile, to ensure a regular backup of it.

- Activate the method⚓
On CAS-MFA, click on the tile showing a grid/table and indicating “a code grid should be generated randomly”

Click the slider to
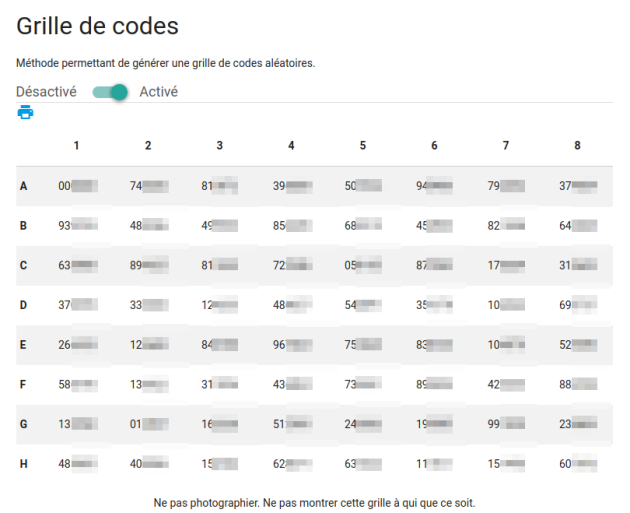
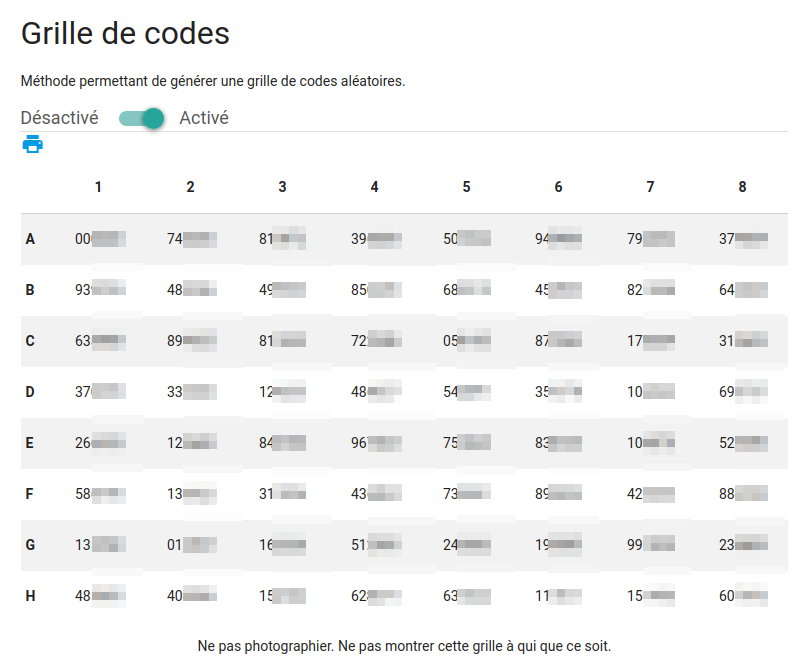
Activatethe method, then onGenerate codes.A 6-digit code grid is generated and displayed.
- Place the grid in KeepassXC⚓
1. In KeepassXC, create an “entry” to hold the secret⚓
If you already have an entry for your Unistra password, go directly to step 2.
Otherwise, start by creating an entry:
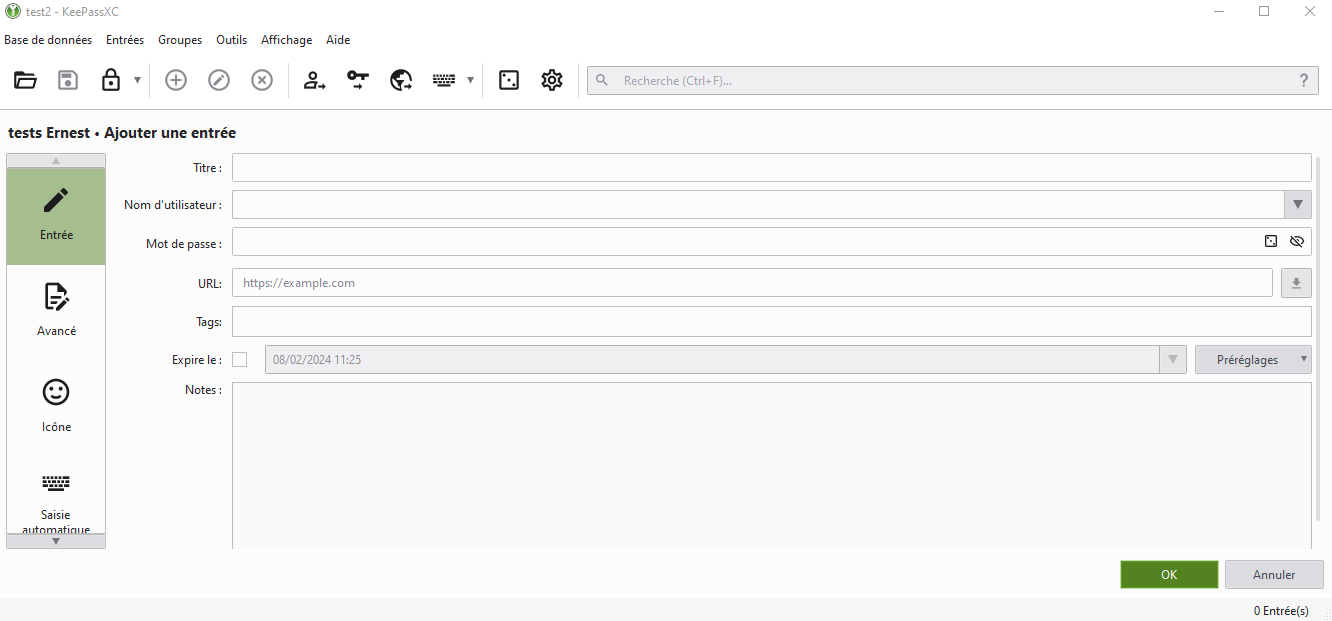
Go to the
Entriestab thenNew entry...Enter the information you need: at minimum a
Title(the name of your entry).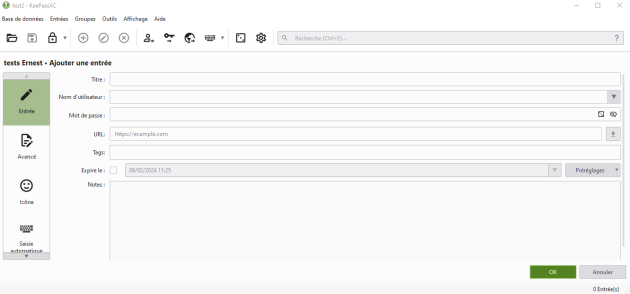
Validate by clicking
OK.
2. Associate this entry with your code grid⚓
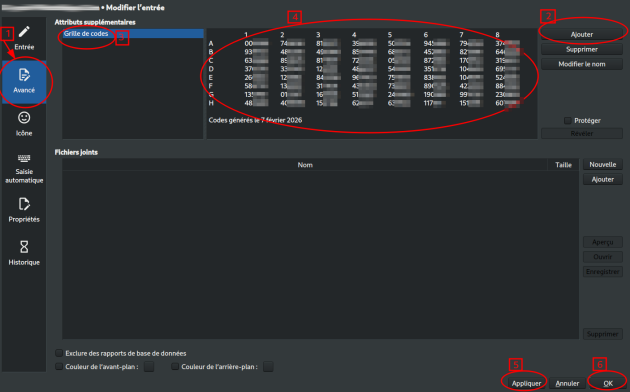
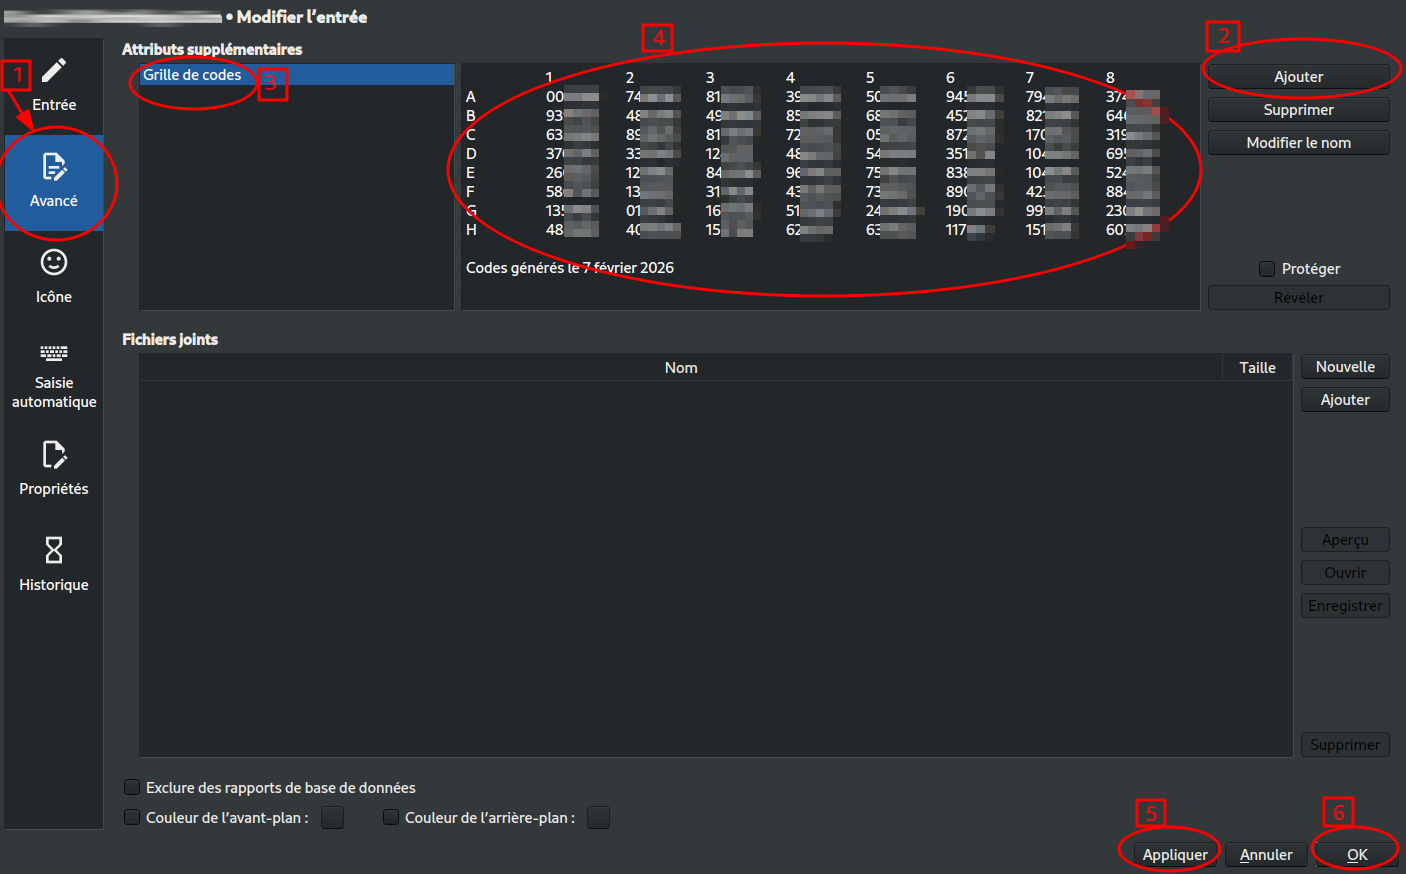
Select the entry then click on the
Entriestab,Edit entry....On CAS-MFA, select and copy the code grid. To do this, you can for example select only the table with the mouse then copy, or perform a
Ctrl+AthenCtrl+Cto copy the content of the whole page.Back in KeepassXC, in the entry modification window:
On the left, click on
Advanced.At the top, in the Additional Attributes section, click the
Addbutton on the right.Give a name to the attribute, e.g., “Code Grid” and confirm with the
Enterkey.The attribute is selected. Click in the empty field of the second column and paste your grid or the previously copied page, e.g., by performing
Ctrl+V. If needed, you can delete the lines preceding the code table.At the bottom of the page, click
ApplythenOKto save.

Procedure : Use the code grid⚓
You are trying to access an application that requires a second factor? Once your Unistra password is validated by CAS, it will display an intermediate page asking you to enter your second factor.
Example :
CAS asking you for a code from a grid:

Extra : You have enabled multiple methods: how to change the one offered?⚓
If you have enabled multiple methods for your second factor, the page will by default propose reusing the same as your last login. To use another one, click on the link « Other login method » then on the tile corresponding to the desired method.
Example of tiles with the TOTP, email and code grid methods enabled:
- Retrieve your code and use it⚓
The CAS page shows you the code coordinates to fill in: in the grid, it is the one located at the intersection of the row bearing the requested letter and the column bearing the requested number (for example row F and column 3 in the previous screenshot).
If you use KeepassXC⚓
In KeepassXC : double-click the entry containing your grid to open it, go to the
Advancedtab, then copy the code at the requested intersection.
On the CAS page : paste the code into the displayed input field.
If the code is correct, you directly access the requested digital service. Otherwise, an error message appears and the input field is presented again.
Note: In case of error and if you had enabled another method, CAS may automatically switch to another method.

Push notification (on Esup Auth)⚓
🔍 It is a validation from a push notification displayed in the Esup Auth mobile app.
Tip : Do you prefer to follow a video tutorial? ✨⚓
→ Activate and use the PUSH notification on mobile.
Otherwise, follow the written and illustrated steps below.
Procedure : Enable push notification sending in Esup Auth⚓
This configuration is to be performed only once, during activation. If the method is already activated, you can use it directly.
Warning :
Below, click the icon (“Show steps in list”) to miss none.
- Activate the method⚓
On CAS-MFA, click the tile with a checkmark indicating “a notification / push will be sent ...”
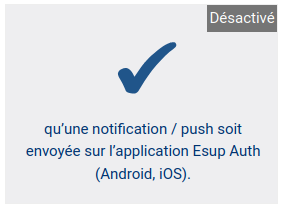
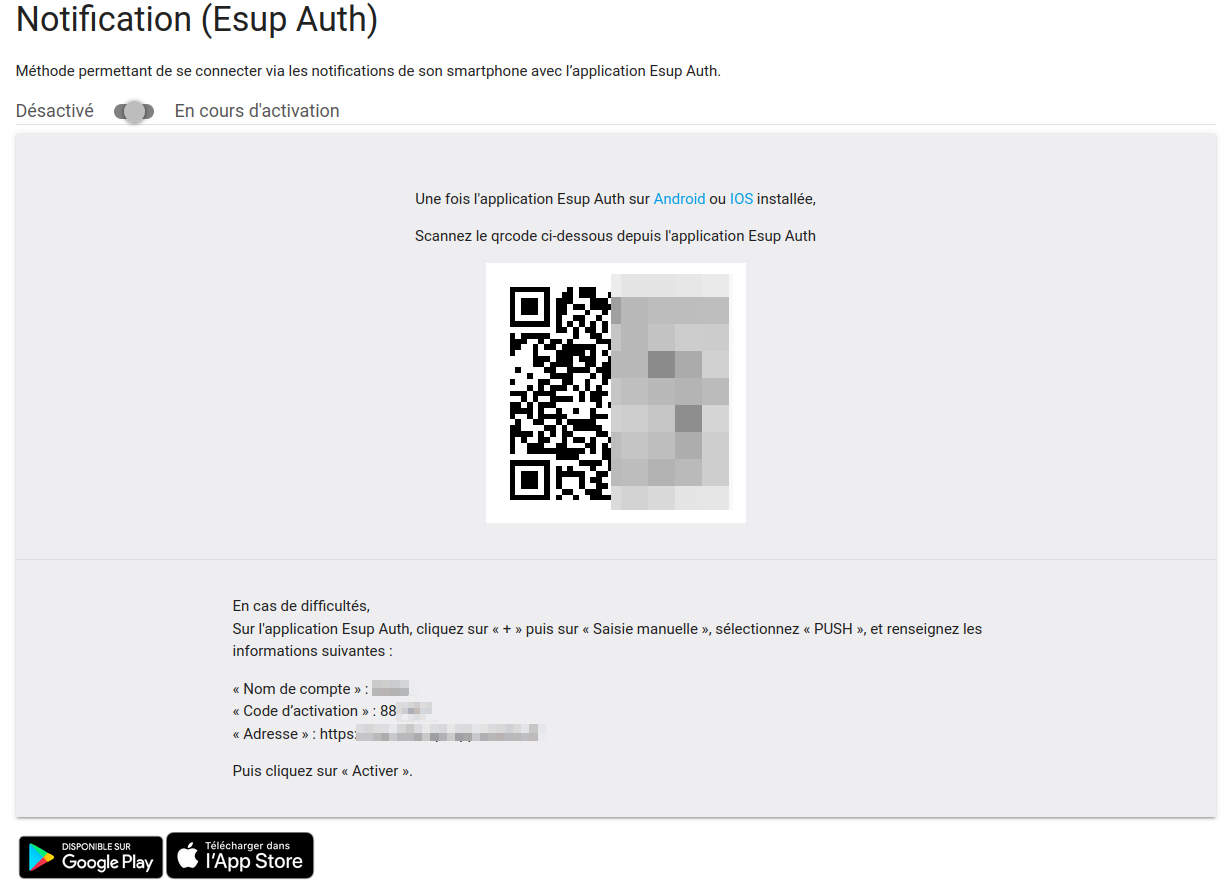
A QR code and several pieces of information are displayed. This is the secret that will allow the application you have chosen to generate PUSH notifications.
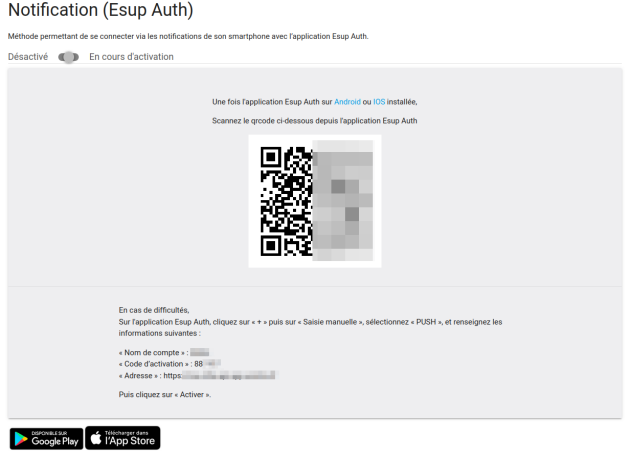
- Install the Esup Auth mobile application⚓
On the page displaying the QR code, click the download link corresponding to your mobile's system (Android or iOS) to install Esup Auth. Once the application is installed on your mobile, launch it.
- Place the secret in Esup Auth⚓
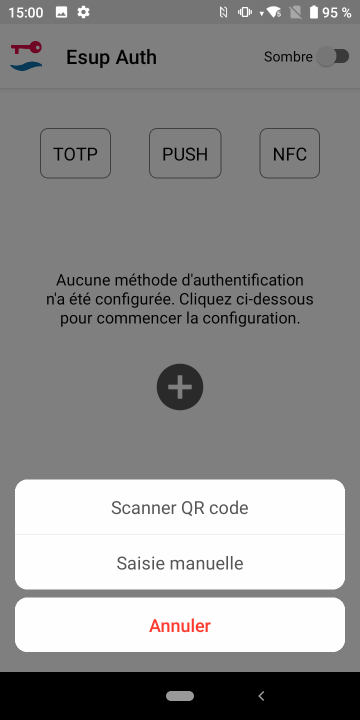
In the application, select
+thenScan QR code.
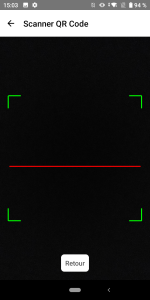
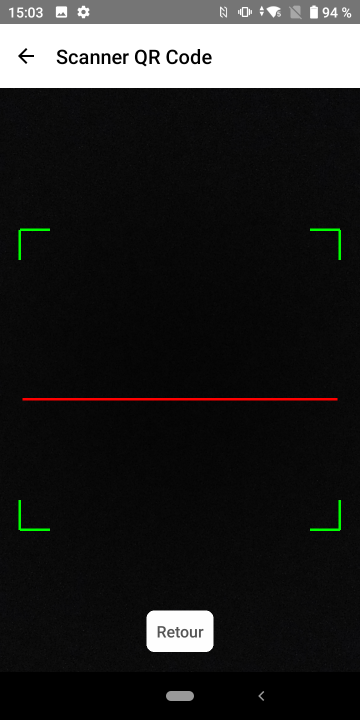
Then scan the code from the CAS-MFA page.
If you have difficulty performing the scan...If you have difficulty performing the scan, you can click
Backto cancel, then click+andManual entry.Choose
PUSH; copy into the fieldsAccount name,Activation codeandAddressthe corresponding information given on the CAS-MFA page then clickActivate. - Result
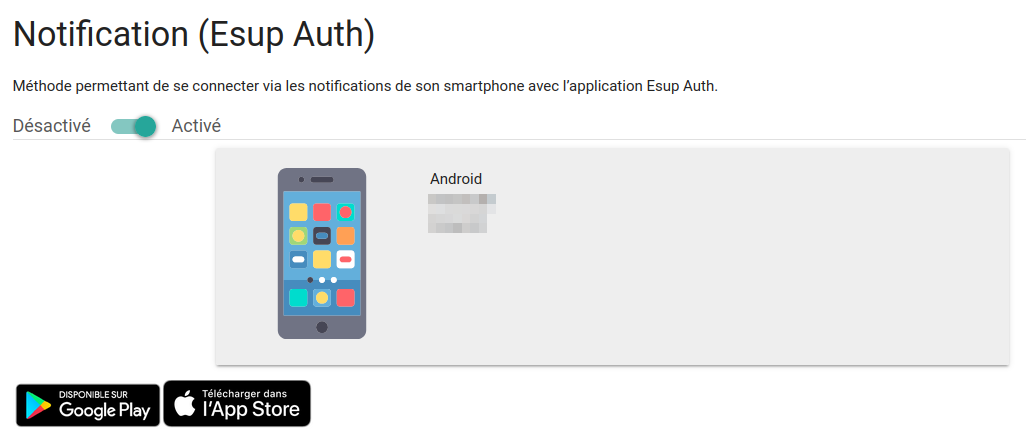
Once the secret is saved and if the activation of the PUSH method succeeded, the application shows you a registration confirmation. On the CAS-MFA page, the bar also confirms that the method is activated and your mobile model is displayed.

Procedure : Use push notifications in Esup Auth⚓
You are trying to access an application that requires a second factor? Once your Unistra password is validated by CAS, it will display an intermediate page asking you to enter your second factor.
Example :
CAS asking you for a validation via PUSH:

Extra : You have enabled multiple methods: how to change the one offered?⚓
If you have enabled multiple methods for your second factor, the page will by default propose reusing the same as your last login. To use another one, click on the link « Other login method » then on the tile corresponding to the desired method.
Example of tiles with the TOTP, email and code grid methods enabled:
- Validate your access via the notification received in Esup Auth⚓
If notifications are active on your mobile, a connection request to your Unistra account is displayed, coming from Esup Auth. For example:

You can click on it or open the Esup Auth application directly: the request is re-displayed in the application.
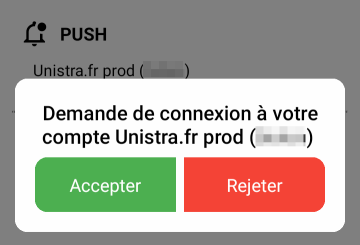
Click Accept. The application confirms the successful action.
Note :
Always verify whether the received PUSH notifications are legitimate: if you receive a validation notification for an access while you are not attempting to authenticate with your account at the same time, it may be the work of a malicious actor. If in doubt, click on
Reject.If the validation succeeded, you directly access the requested digital service. Otherwise, an error message may appear and the input field will be presented to you again.
Note: In case of an error or a too long delay and if you had activated another method, CAS may automatically switch to another method.
Physical WebAuthn factor⚓
🔍 It is a validation via an action performed on another previously associated hardware device (e.g., touching a USB security key inserted into the device or unlocking a smartphone).
Note :
This method can be activated if you already use it for other purposes, for example for national applications. DNum does not provide specific support.
➡️ To activate the method:
On CAS‑MFA, click the tile showing a USB key and indicating “Physical WebAuth authentication factor (…)”.

Click the slider to
Activatethe method then click “Add +”.Follow your browser’s instructions. These may vary depending on the browser (Firefox, Brave, Chrome, Safari, …) and the chosen physical device (USB key, smartphone, etc.).
Currently, the ESR version of Firefox (default browser) and some Linux distributions only support USB keys and do not allow associating other devices (this option is therefore not offered).
➡️ To use the method: perform the required unlocking action on the key or associated device.
This configuration is to be performed only once, during activation. If the method is already activated, you can use it directly.
Tip : Do you prefer to follow a video tutorial? ✨⚓
If you have never used KeepassXC or have not yet created an entry for your Unistra account, start with this dedicated tutorial: Configure KeepassXC and its browser extension.
Then: Activate and use the TOTP code with KeepassXC.
Otherwise, follow the written and illustrated steps below.
Warning :
Below, click the icon (“Show steps in list”) to miss none.
If your workstation is managed by DNum : KeepassXC and its extension are pre‑installed on Windows and Linux machines (extension on Firefox). For macOS, contact us if needed.
If you manage your workstation yourself : from the vendor's site, you can download and install KeepassXC (Windows, macOS, Linux), at https://keepassxc.org/download then its browser extension at https://keepassxc.org/download/#browser
Once KeepassXC is installed, if not already done, perform its initial configuration:
Open KeepassXC then click on
Create a database.This is the encrypted file that will store the various usernames and passwords you entrust to it.
Enter a name for this database (optional).
Set the encryption parameters. You can use the default settings (“KBDX”).
Choose a strong password (ideally a good passphrase) to unlock your database, i.e., access all passwords stored in this database. Do not use your Unistra password!
⚠️ No one will be able to recover this password if you lose it. Don't worry, if you follow our creation recommendations (link above), it should be easy for you to remember ... while being difficult for others to find.
Choose the storage location of your database on your workstation.
⚠️ Make sure to choose a location located in your AD (usually “Desktop” or “Documents”) or synchronized via Seafile, to ensure a regular backup of it.
On CAS-MFA, click on the three‑star tile indicating “that a code (TOTP) is generated ...”
Click on the slider to
Activatethe method.A QR code and a string of characters are displayed. This is the secret that will allow the application you have chosen to calculate the TOTP codes.
1. In KeepassXC, create an “entry” to hold the secret⚓
If you already have an entry for your Unistra password, go directly to step 2.
Otherwise, start by creating an entry:
Go to the
Entriestab thenNew entry...Enter the information you need: at minimum a
Title(the name of your entry).Validate by clicking
OK.2. Associate this entry with your TOTP⚓
Select the entry then click on the Entries tab, Time‑based One‑Time Password (TOTP) then Configure TOTP…
On CAS‑MFA, select and copy the string of characters displayed just below the QR code (uppercase letters and numbers).
Back in KeepassXC, in the window that opened, paste the string into the Secret Key field. You can leave the other parameters at their defaults.
Validate the entry recording by clicking OK.
✨ If you want to use the KeepassXC browser extension so that your TOTP codes are automatically entered, your entry must at minimum also contain the
URL“https://cas.unistra.fr”. If needed, click on it thenEdit Entry…to add it.In KeepassXC, right‑click on your TOTP entry and, in the context menu, click on Time‑based One‑Time Password (TOTP) then Copy TOTP.
You can also, as an alternative, select the entry and use the keyboard shortcut Ctrl+T.
Back on the CAS‑MFA page, paste into the right‑hand field requesting a 6‑digit code then click Validate.
Note: The copied code is valid for 10 seconds; if needed, repeat your copy/paste.
If the TOTP method activation succeeded, the CAS‑MFA page changes to show the active slider.
Otherwise, retry the entry or copy‑paste of the 1st TOTP more quickly (which may have expired).
Although optional, the following steps can considerably simplify your daily use.
Tip :
✨ Do you want to use the KeepassXC browser extension so that your TOTP codes are automatically entered? Once the extension is installed in the browser (see previous steps), establish the link between KeepassXC and it:
In KeepassXC, go to the Tools tab then Settings.
In the left column, select the Browser Integration tab.
Check the box Enable browser integration then the boxes for the browsers you use (by default, at least check Firefox). Validate by clicking OK.
Open your browser (e.g., Firefox) and, at the top right of the window, click the icon representing a puzzle piece (the “Extensions” or “Add‑ons”).
Click on the “KeePassXC‑Browser” extension then on Connect.
A window opens and KeepassXC asks to link your vault/database with your browser: give a name to this link (optional) then click Save and allow access.
Close and then restart your Firefox browser to use the extension.